
Introduction
You might face yourself in a position where you have to secure files and the current state of a Cloud PC for investigation. With the Place Cloud PC under review feature, you can take a snapshot of a Cloud PC to secure data and safely hand it over for investigation. In this blog post, I will go through the prerequisite, how to use the feature and what it means for the end-user.
Prerequisite for placing a Cloud PC under review
Before you can mark a Cloud PC for review, you will need a Windows 365 Enterprise license and an Azure Storage Account. The administrator account you use in the Endpoint Manager portal does not need permissions to the Storage Account itself. Only the Windows 365 application needs the permission Storage Account contributor.
You will of course, need permission from the Storage Account to access the data or set permission for the Windows 365 Application. But you don’t need permission to use the feature itself.
The subscription that holds the Azure Storage Account must be in the same Azure AD Tenant as your Windows 365 setup. You can use an existing Storage Account if you have one, if you don’t have one or know how to create one, look at the tables below.
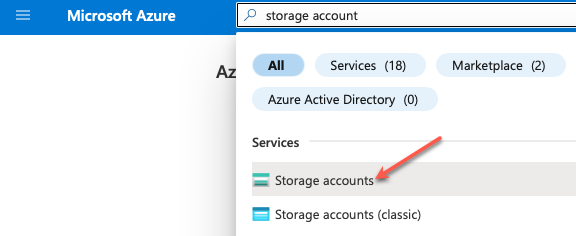
Login to https://portal.azure.com and go to Storage Accounts.
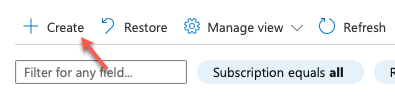
Click on Create.
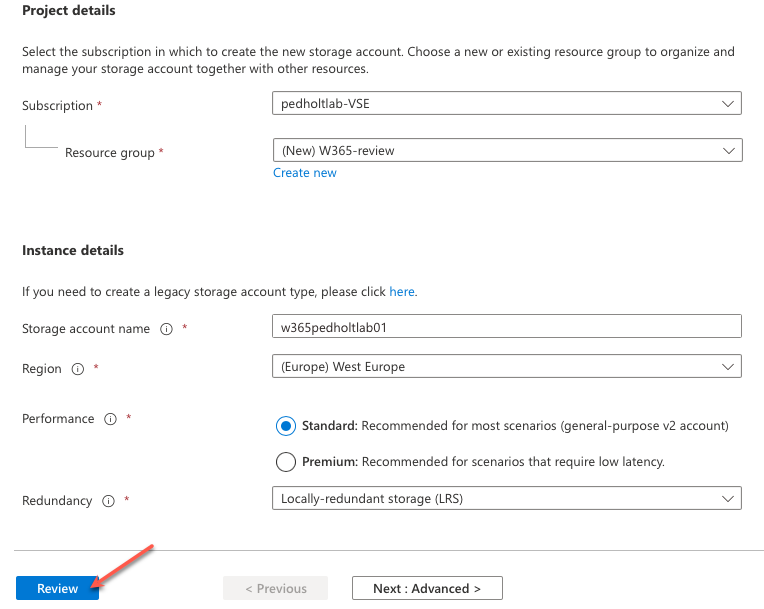
Type in the required information.
NOTE!: If you select the Premium tier, you must select Page Blobs.
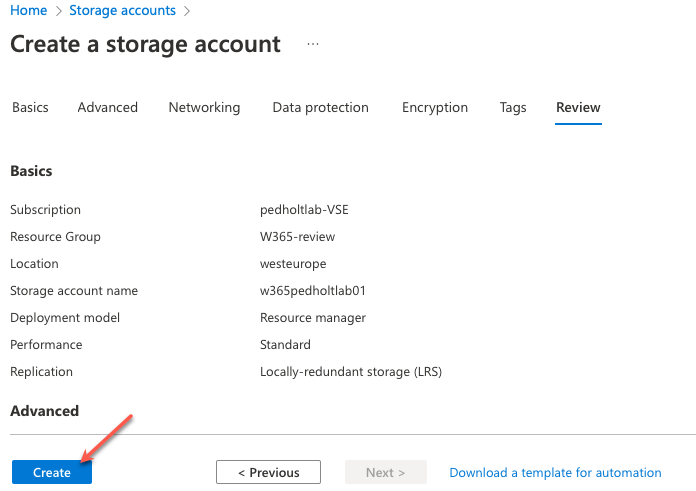
Click on Create.
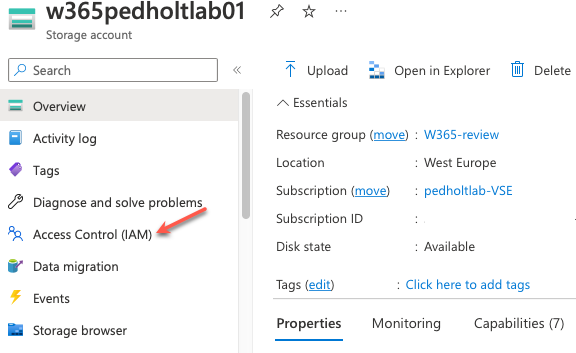
Go to Access Control in your Azure Storage Account.
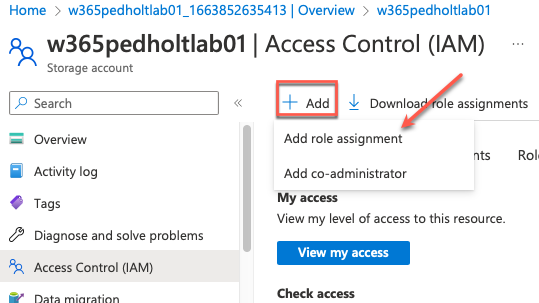
Click on Add and select Add role assignment.
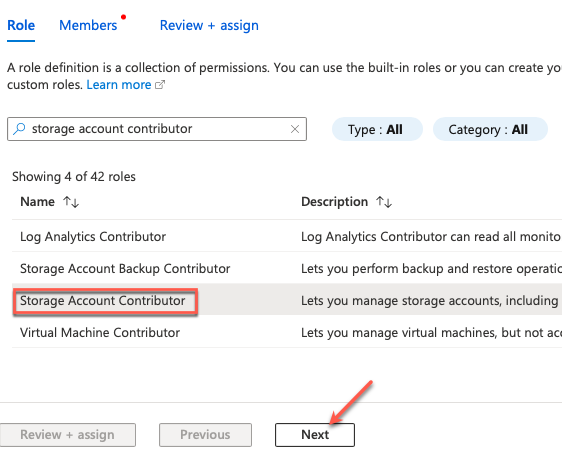
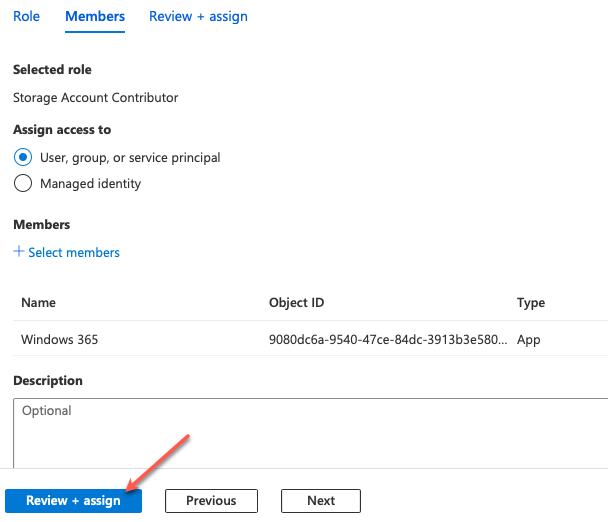
Search and select Storage Account Contributor, click on Next
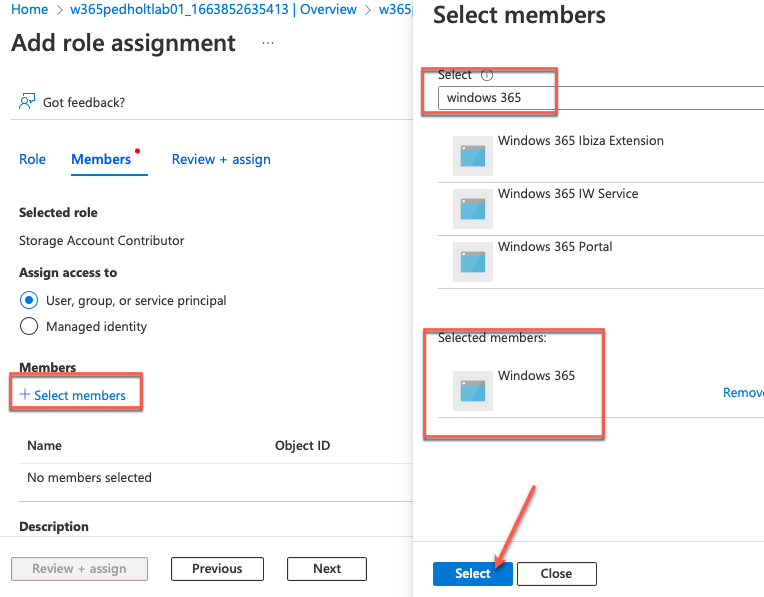
Click on Select members and search for Windows 365.
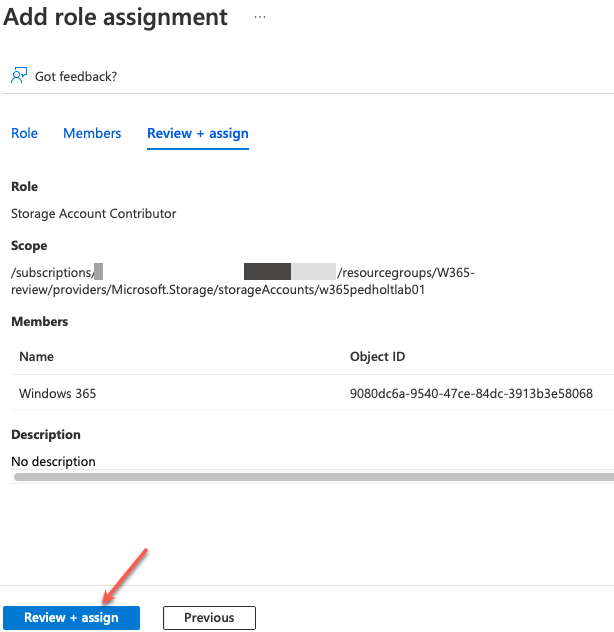
Select Review + assign twice.
How to place a Cloud pc under review
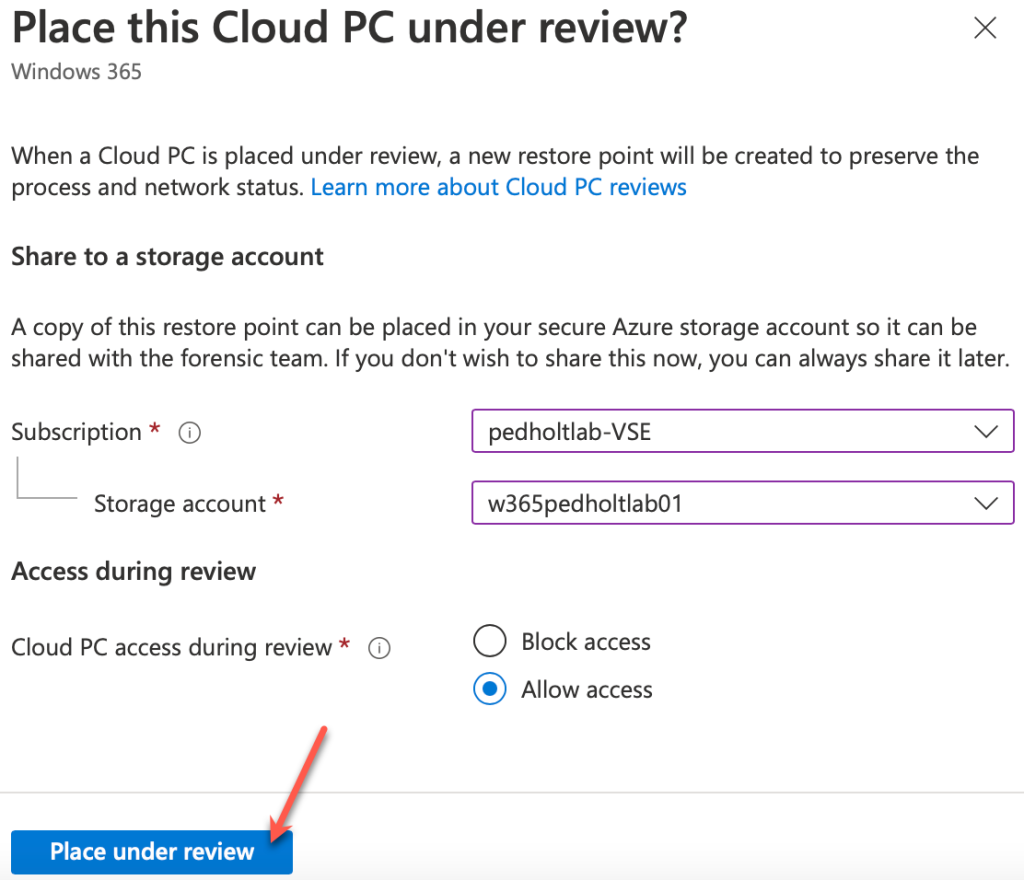
Placing a Cloud PC under review is straightforward. Under the enablement of the feature, you will have to choose if the user should have access to the Cloud PC or if they should be denied.
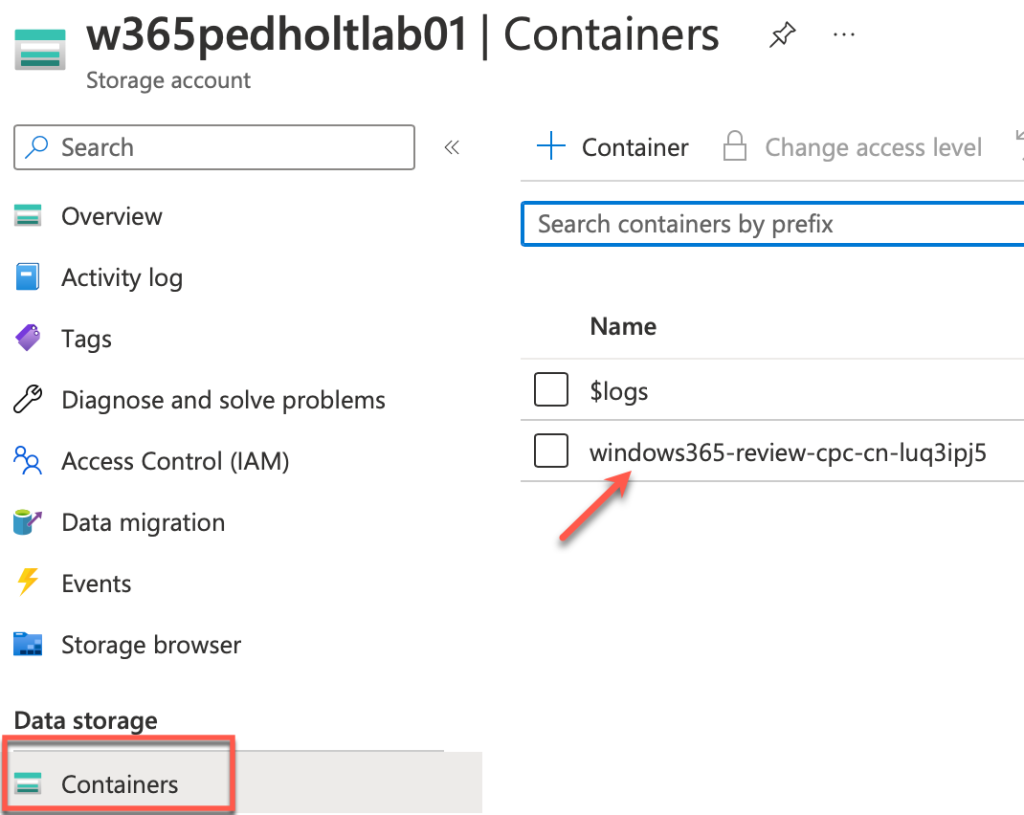
There will be a Blob container on the specified Storage Account where you can find the VHD file for the specific Cloud PC.
When the Cloud PC has been put under review state, you will, as an administrator, not be able to perform any actions to the Cloud PC from the Endpoint Manager portal. Click on the table below to see how to place a Cloud PC under review.
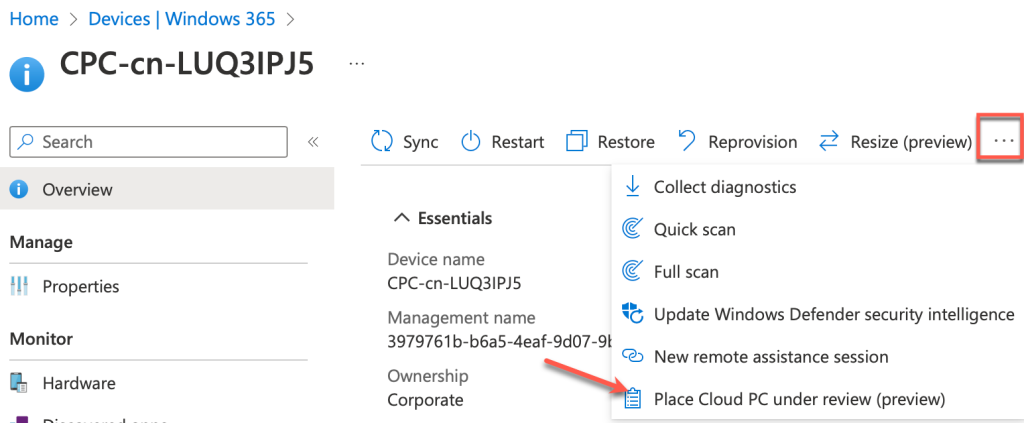
Login to https://endpoint.microsoft.com and select a Cloud PC.

Find and select Place Cloud PC under review.
Fill in the required parameters.
What is the end-user experience?
Allowing access to the Cloud PC while being reviewed will let the user continue their work as if nothing happened. The user will, however, not be able to perform any of the self-service actions in the https://windows.microsoft.com portal.
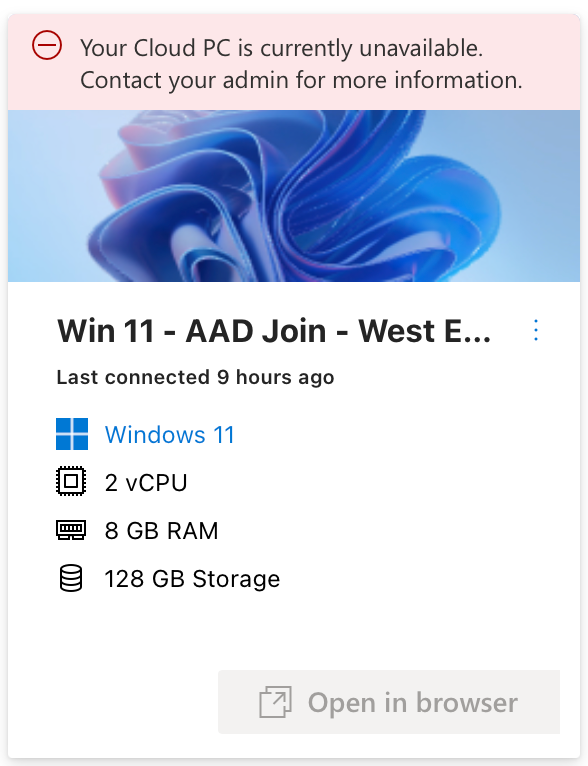
If you block access to the Cloud PC, it will shut down immediately.
The user will see the following message at https://windows365.microsoft.com.
Access the saved VHD file
Knowing how to access the VHD file might be handy to give access to other people or download it yourself. Check the table below to learn more.
Login to https://portal.azure.com and find the storage account you selected when you activated the review for the Cloud PC.
Go to Containers and select the Blob container with the correct name. Each Cloud PC under review will have its own Blob container.
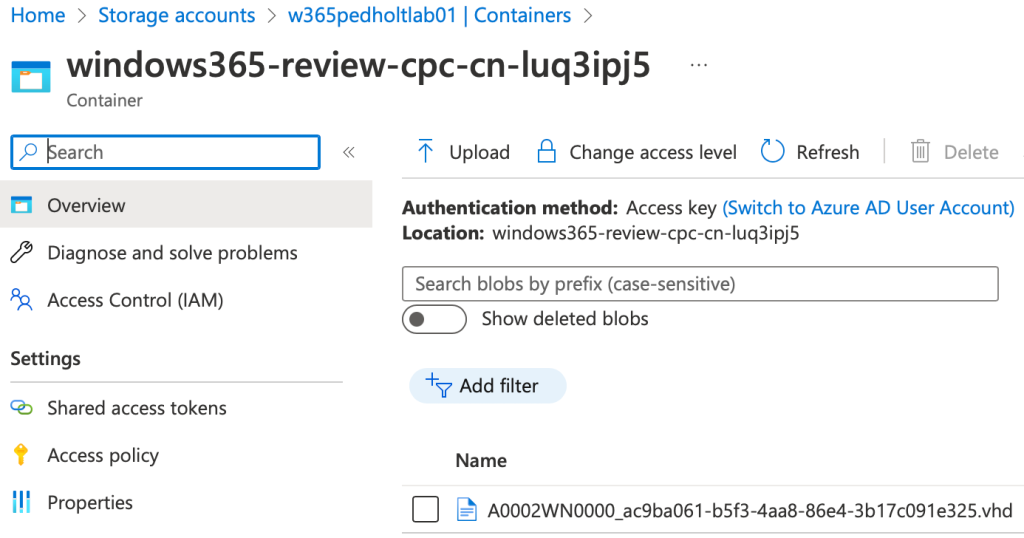
From here, you will see the VHD file. You can then download it or give access to others to investigate it.
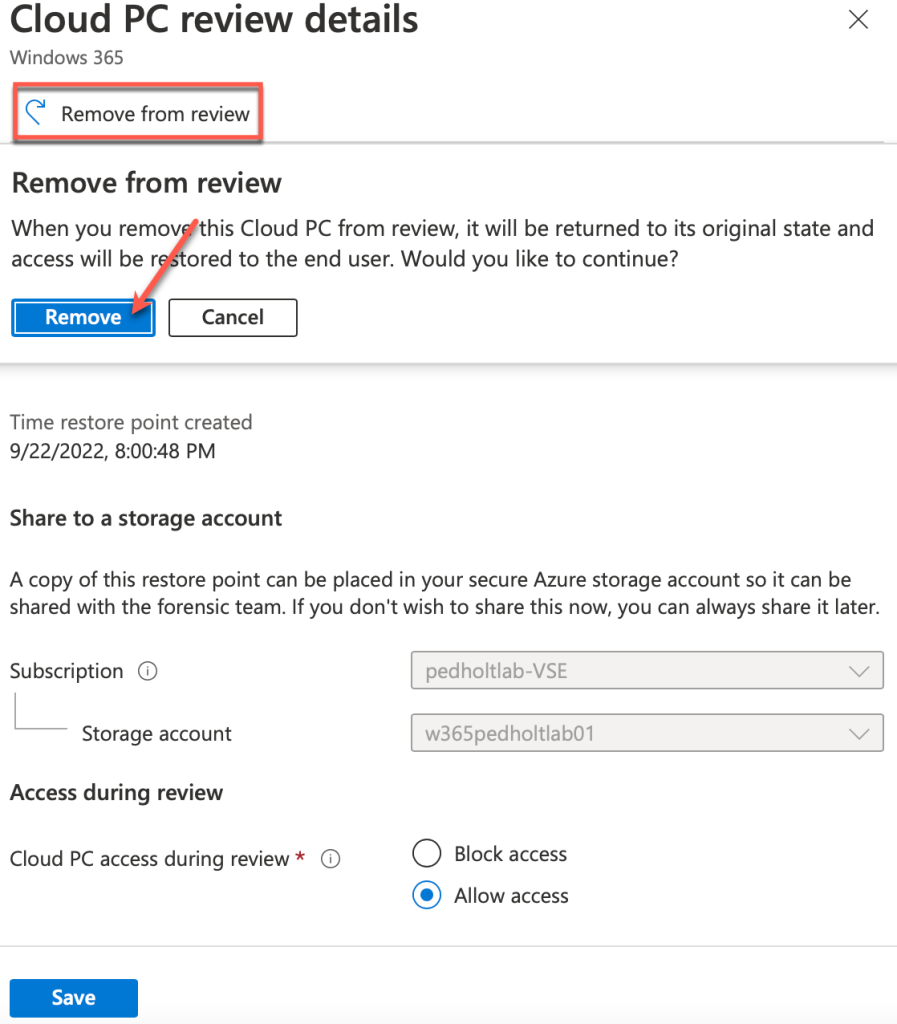
Take Cloud PC out of review
You might want to take the Cloud PC out of the review state at some point. Follow the steps in the table below.
Login to https://endpoint.microsoft.com and find the Cloud PC you want to take out of the review.
Click on the text The device is being reviewed. View details and configure settings
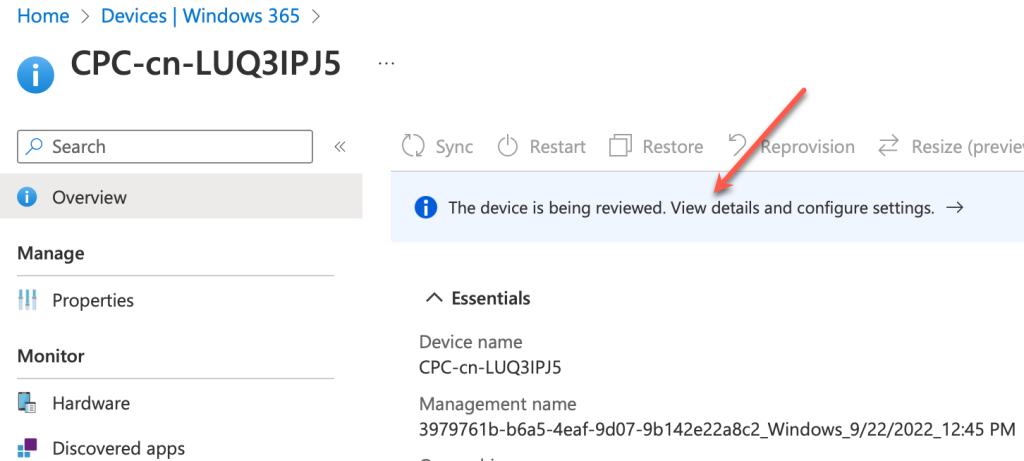
Click on Remove. If the access is blocked, the user will be able to log on to their Cloud PC again within minutes.
Pingback: Weekly Newsletter – 17th September to 23rd September 2022